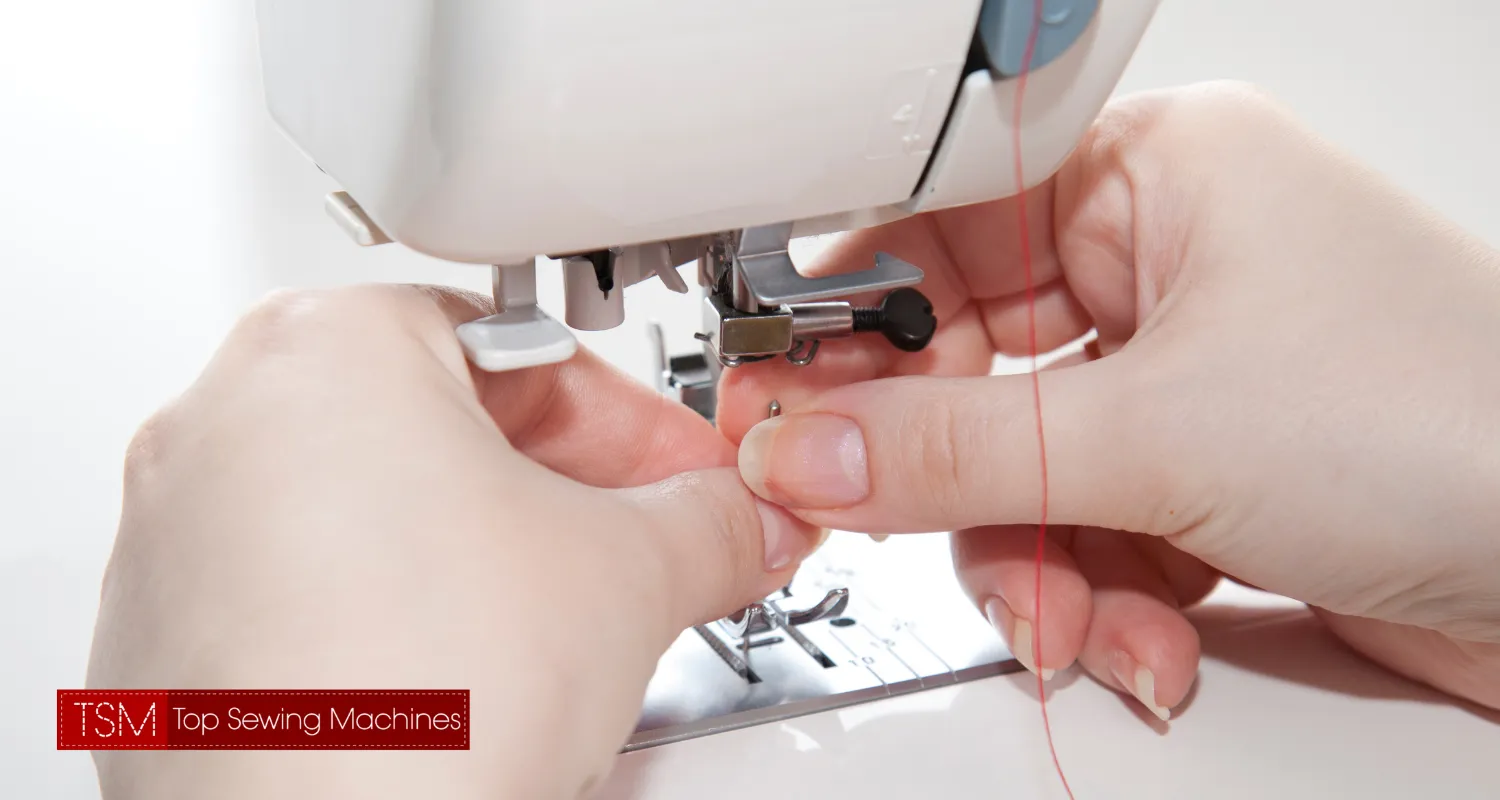
So you’ve got your new sewing machine but now you’re a bit lost for an idea of what to make?
Not many people can jump straight into making a dress or anything too complicated. It’s best to start simple and work your way up.
After all, you want to master your sewing skills one step at a time, right?
This all begs the question, what can I do with my sewing machine?
And many many more!
The truth is, the list is practically endless. So we’re going to look at a variety of projects you can get started on.
They will all demonstrate different techniques so you’ll be able to pick up things along the way.
Steps closer to becoming a sewing master!!

Tip One
Always make sure you have an understanding of each step.
A good habit to get into is to take some time before starting a project to have a read of the directions.
Tip Two
Take your time!
I know the temptation can be to rush in and get to the sewing as quickly as possible. However, you should always take your time when you’re cutting pieces of fabric.
Tip Three
Mistakes are going to happen. Try not to get downhearted or dispirited by it.
Everybody makes mistakes and they genuinely do help to give you a better understanding so if you can, consider them to be a good thing!
Tip Four
Learn how your sewing machine works.
Knowing how to fix simple issues with your sewing machine will make your time much more enjoyable. Even the most accomplished user will find their sewing machine goes wrong from time to time.
If you know how the machine works, then the chances are you’ll be able to work out what’s wrong with it.
Want some tips? Find them here!
Need to know how to set up your sewing machine properly? We’ve got you covered! Find out here!
Tip Five
Have a good set-up.
Being in the right environment makes a difference.
You will be much more creative and enjoy yourself if you can concrete and feel comfortable where you’re working.
Having a dedicated sewing workstation can make the world of difference to people. When you’re there, you know what you’re doing and you can focus.
Tip Six
Enjoy yourself.
This is a hobby, right? Hobbies are meant to be enjoyable!
As frustrating as some steps or even projects can be, remember why you’re doing it.
Relax and enjoy yourself!
Tote bags are super handy. Can you ever have too many? I’m yet to find the limit.
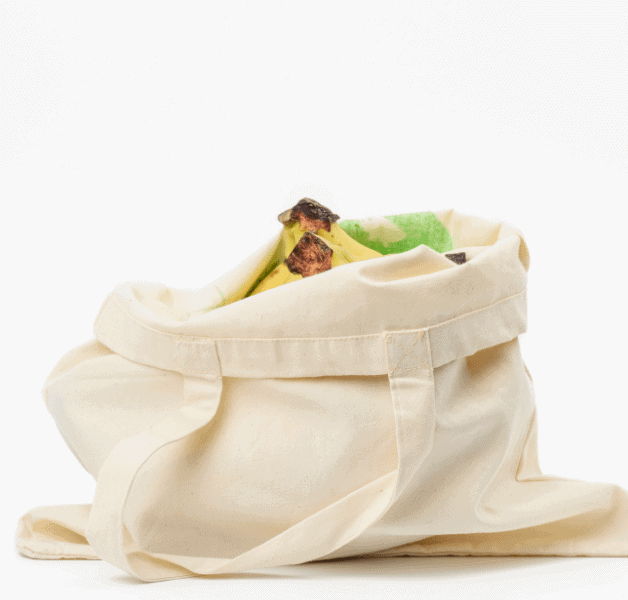
So this one will be eco-friendly, washable, and one you’ve made yourself!
You’re going to need:
Step One
The first step is to measure and cut the fabric.
For this, you will need a rotary cutter, a ruler, and a cutting mat.
Cut both your inner and outer fabric into 14 x 14” squares.
Step Two
Now it’s time to get the straps ready.
Most people choose to use the same fabric as they’re using on the outside. You don’t have to - make it as jazzy as you’d like!
The straps should be cut to be around 5 x 28 inches. Cut them the same way as the squares were cut.
Step Three
For a tote bag, you should look at getting interfacing that has a good bit of durability.
The interfacing needs to be slightly smaller than your fabric - time to cut it!
Pop the interfacing on the inside of your outer fabric.
When it comes to attaching the interfacing, I’d recommend following the instructions.
Although I can’t say I always do.
Quite often I just pop my iron onto the cotton steam setting and hold it there until I’m confident the interfacing is secure.
But hey, whoever practices what they preach?
When your interfacing is in place, do the same for the other fabric pieces.
Also, do the same for the straps. Be sure to do it on the wrong side of them.
Step Four
Time to give the straps some attention.
Each strap can be folded lengthways in half.
Iron alongside the fold.
Take the outside of the strap and place it into the middle. Iron it down so that the fold forms.
Fold the straps, you should find that your straps will be 1.25” wide.
When you’re happy with them, pin them into place.
Then you can stitch each edge. It’s best to allow a seam of around ¼ inch.
Step Five
Now that the straps are done, it’s time to get the lining sorted.
The lining pieces should be placed with the right sides together.
Leaving the top open, pin three of the sides together.
When you’re happy with how they are pinned, sewing those sides up. To do this you can use either a zig-zag stitch or a straight stitch.
Step Six
It should be starting to come together!
Pin the straps to the outer fabric. Ideally, this should be around 2 and a half inches from the edge.
You can attach the strap to the fabric by sewing them. You want to aim to stitch as close to the edge as you can.
There is always the option to skip that step if you’d prefer to keep the straps in place using the pins. Whatever works best for you!
Once the straps are attached in a manner that you’re happy with, then the outer fabric pieces can be placed with the right sides together.
Pin and then follow it up with sewing three sides together using either a straight stitch or a zig-zag stitch.
Step Seven
In order to make it a useful bag that has a decent amount of space and depth, we’re going to cut some squares into the bottom.
To do this you’ll need the ruler and marking pencil.
On either bottom corner, mark out two squares, both 2 inches in size.
Cut the squares using the sewing scissors. Do the same for the outer fabric pieces.
Step Eight
You can now pinch them together and line the seams up.
Pin them into place and then follow it up by sewing them together. A straight stitch or zig-zag stitch will be ideal for this.
As you should now - hopefully - be able to see, the bottom of your bag is four inches deep!
Great for getting a good amount in.
What you should have are two bags. An outer bag and a bag that is the lining of a bag.
Time to put them together!
Step Nine
Take the lining bag and turn it so it’s the right side out.
Pop it into the fabric bag and they all should be facing the right way round. Got it? Cool!
Match up the seams and pin them together. Don’t forget to leave an opening for turning! (Yes I may or may not be speaking from experience there…).
Once everything is in place, take the arm of your sewing machine and using the straight stitch sew around the top of the bag.
To give your tote bag extra strength, stitch over it a few times. If you really want to add even more strength, use the zig-zag stitch as well.
You will notice that there are tops of the straps sticking out of the top of the tote bag?
These can be cut off.
Step Ten
Final step!
Turn the tote bag inside out and pop the lining inside of the bag.
Around the top of the bag give it a press down. This will get rid of the air and enable you to pi the opening.
Make a top stitch all around the top of the bag. This finishes things off nicely and makes it more durable.
There we have it! One complete tote bag!
Creating simple letters for children is a great way to get the children into playing with words but it also makes a great project for you!
If you don’t have a sewing machine, you can still do this project.
It’s very possible and relatively straightforward to hand-sew felt letters and fill them with stuffing. Though I’m not going to lie, it is time-consuming and your life will be a lot easier if you have a sewing machine.
Sewing fabric letters isn’t a huge undertaking and will take a few nights worth. I found them to be great fun!
Ok so let’s get started with materials. Quantity is going to vary based on how many letters you want to make.
Start with a top piece of patterned fabric and the bottom fabric should be a solid coloured fabric.
In the middle of these two, place two squares of cotton batting.
I found it to be helpful to trace the letters onto the fabric using a marking pencil and then pinned my fabrics together.
For the letters, I used these templates.
So now your letters should be pinned into placed and you can start sewing them together!
It’s quite a simple process, although it does get trickier when you need to cut inside of a few letters.
A little tip is to use small sharp scissors for those moments.
Once you have sewn your letter, take the pinking shears (or scissors) and cut around the letters.
That’s it!
Really simple project. The great thing is you can change it up easily depending on the recipient by changing the fabric and colours.
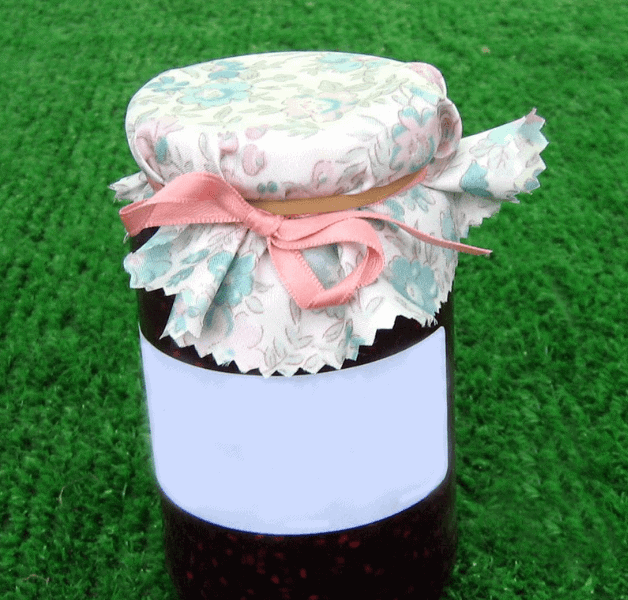
Jam jars have been topped with fabric for years so being able to make your own or surprise someone with a lovely present is fantastic.
Step One
Take your fabric and cut a circle, 15 cm in diameter.
Step Two
Take the trimming fabric and pin it to the edge of the circle. When it’s in place, stitch it together using a running stitch.
Step Three
Let your imagination run wild with this step!
Add a little bit of character to your jam jar topper. Either with buttons, elastics, jump ring. However you, please.
Step Four
Take the fabric and place it on top of the jar - the lid should be screwed on.
Stretch the hair elastics of the jar around the jar rim. This will keep the fabric in place.
It’s a good idea to also have one of these stashed away in your bag. When it’s time to take off your sunglasses, you have somewhere for them to go, without them getting scratched or damaged.
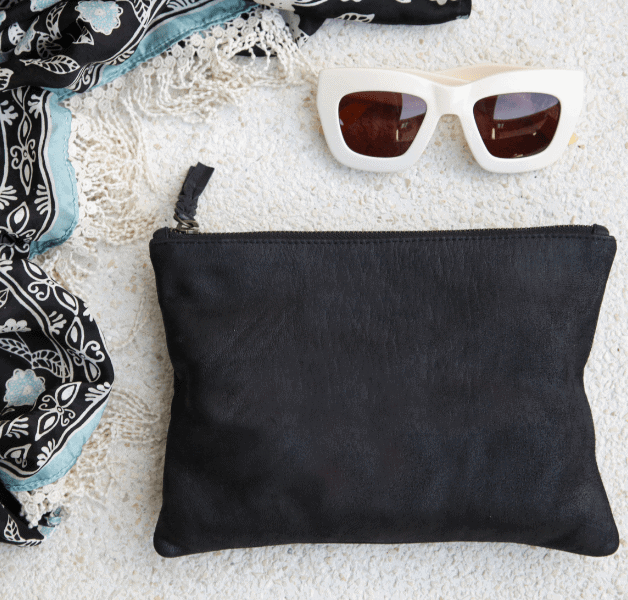
In terms of ease of making, it’s beginner-friendly and a good project for many.
Most sunglasses should be able to fit into the case. Though if your sunglasses are larger than normal then you may need to wrap some fabric around them to be able to ensure you get the correct width.
Anything greater than seven inches will require you to increase the size of the pouch.
Step One
Start by folding the fabric lengthways, with the right sides together.
When the fabric is folded the size should be 3 ⅞ “ x 9 ½”.
You will need to mark out when the drawstring will be going so grab your marking pen or pencil.
From the top of the case mark 1 ½” and 2” down. This is where your drawstring will go-between.
Step Two
From the top edge begin stitching.
Stitch as far as the marking and then do a backstitch. Cut the thread and start again at the next marker down - which should be the 2-inch point.
When you get to the bottom corner, pivot and stitch to the folded edge. Again, backstitch and cut the thread.
Step Three
The seams need to be pressed open so that you can make the top casing.
Take the top edge and fold it down 1 ½ inch. Press down.
Fold the edge 0.5 inches and press down again.
A lot of people find it good to pin it down. You don’t have to, whatever you find easier.
When the top casing is in place, topstitch it. The stitches should be close to the folded edge and around the 1-inch front of the top.
Step Four
Take the ribbon and attach one edge to the safety pin.
Thread this through the casing and if you’d like, knot the ends.
There it is! Your new sunglasses case. Pretty sharp, isn’t it?
Hopefully, that will help keep your sunglasses scratch-free for longer.
What are your tips for keeping your sunglasses looking fresher for longer?
Chilly hands? Nothing worse is there?
This is a simple handwarmer, designed to keep the chill away from your hands.
You can make this with or without a sewing machine.
Once he’s made you can pop him in the microwave and he’ll make your hands nice and toasty!
Step One
Below is the template for our bear. Feel free to find another one if you don’t like it.
If using our template, enlarge it to A4 size and print.

Step Two
You will want to have four separate bits. Grab your scissors and separate them so you have ears, face and nose.
Step Three
Dark brown felt for the ears.
Light brown felt for the nose and face.
Beige fabric for the face.
Mark and cut the fabric out based on the fabrics above.
When it comes to the face and ears, you should allow for a seam allowance of 1cm. This isn’t needed on the nose.
You will need to make four ears.
Step Four
Take the ears and sew the curved edge.
Any excess on there, you can trim off using the scissors.
Once that is done, you can turn them out.
Step Five
Take the felt nose and pin it to the front of the bear.
If you’re unsure about the placement, you can use the template to make sure you get it in place.
Once you’re happy with the placement, you can use a blanket stitch around the edge.
Step Six
Use your marking pen or pencil to draw on the nose (starting to look pretty cute, right?).
Take the brown thread and sew along the line you have just drawn.
Fill the nose with the same thread by using a satin stitch.
Repeat the same process for the eyes and mouth but use the black thread instead of the brown thread.
Step Seven
With the ears, they need to be pinned at the top of the face. Try to face them inwards so that they go towards the eyes.
Step Eight
You can now start sewing the front and back fabric together. As before, aim to leave a seam allowance of 1cm around all of the bear.
At the bottom, try to leave a 2 inch gap, we will need this for turning.
Don’t forget, if you’re not sure, use the template as a guide!
Step Nine
When the bear is sewn up, turn it the right way out.
Time to fill it up! Pour rice into the bear and fill it two thirds full.
Step Ten
The edges that are left can be pinned and sewn together to close up the gap.
Step Eleven
Your bear is complete and hopefully looks cute!
To warm him up, place him in the microwave for around 30 seconds. Another alternative is to pop him on the radiator.
Has your child just got their first sewing machine and looking for the first project?
Pillowcases make the perfect first project for children so a great time to get the kids involved!
Your children will learn a lot of different skills when they complete this project. Meaning that they will be able to tackle more complex projects as they progress.
To get started, you’ll need a plain pillowcase. Choose a colour that works for you - or your child!
This project doesn’t need to be pricey. If you have any scrap fabric lying around the house, this is the perfect time to use them up!
If you don’t have scraps, nip to a shop or have a look online for some patterns and designs that you and your child will like.
This material will be used to create the shapes and patterns onto the pillow.
This is where you let your child's imagination run wild! They can create whatever shapes they want. Stars, animals and smiley faces are popular but rocket ships are a personal favourite in this household.
So you’ll find the easiest way to get going with this to use some paper-backed fusible webbing.
It’ll need to be around the size of the pillowcase - don’t worry about the hem. By having it this size, it works as a solid guide as to how much space you have to be creative.
One little tip is that you might want to make the shapes to be sort of straightforward. Straight lines are easier to deal with. As you get more confident, you can start taking on more complex shapes but it’s best to start simple and work your way up.
When you’re happy with the shapes, you can cut them out and it’s best to do this pretty loosely.
Press the fusible side down onto the fabric.
At this point, you can then cut the designs out more closely.
Time to get a bit more technical with some tools!
Unpick the side and long seam of the pillowcase.
Flatten the pillowcase the best you can, removing as many wrinkles from it.
Construction time!
Arrange the shapes you’ve cut out onto the pillowcase.
When you’ve reached the point where you’re happy with where they are, you can remove the paper backing off them and stick them into place.
A little tip is to start at the edges of each shape and start sewing. This way, they will be held in place.
It’s also the easiest place to start so if it’s your first time on a sewing machine, it’s the best place to get used to it!
When it comes to needing to change direction, put the needle down. Then you can bring the pressure foot up.
This allows you to be able to move the fabric to the correct position.
Once it’s there, pop the foot back down and away you go again!
If any of your designs have curves, you will find that you need to do that quite a lot but it keeps things interesting and you’ll get used to it rather quickly!
When you have gone all the way around a shape, you can cut the thread and make a start on your next shape.
Once all of the shapes are done, all you need to do is sew the pillowcase back up to how it was when we unpicked it.
Then that’s it! Your child will have created their very own pillowcase and picked up a lot of sewing techniques along the way!
Are you looking for more sewing projects for kids? Look here!
As I said in the introduction, there is so much you can do with a sewing machine - the list is endless and we’ve only just touched the surface.
Be sure to check back for future sewing machine projects!