Our Top Beginner Sewing Projects For Gifts, Accessories & Practicality!
As a beginner sewer, it can be overwhelming to know what to sew when you buy your first sewing machine, with a bucketful of projects to try out, finding what is best for your sewing skills can be a task.
That's why we've put together our best list of beginner sewing projects for you to try out with your sewing machine below, with most just involving straight lines and simple beginner skill levels, allowing you to get creative and grow your confidence with sewing.
So without further ado, let's get into the sewing projects for beginners below.
Our Best Beginner Sewing Projects For You To Try At Home
To help you narrow down which sewing project you want to try with your machine, we have split our project for beginners into different categories such as; gift projects, useful projects, and accessories projects.
Let's get sewing!
Beginner Gift Sewing Projects
Baby Blankets (For Getting Into Quilting)
Making a baby blanket for your baby or expecting friend can be an excellent project gift as a beginner as all it involves is straight lines and is also a great way to use up scrap fabric if needed.
You'll need pre-cut fabric of choice into 5-inch squares for this (they can be different colours and patterns) plus a yard of soft fabric for the bottom. You should also have embroidery floss and a quilting needle.
We've listed the simple method down below.
Step one - Lay your fabric out on the floor and decide on the quilt pattern you want then start sewing the rows together by putting the right side of two squares together then sewing a 1/4-inch seam.
Step two - Repeat for one row then do for the next until finished. Once all rows are finished you need to sew each row to each other.
Step three - To sew each row to each other, pin one to the next with the right sides together then match the seams and sew together, repeat until the full blanket top is done.
Step four - Get the bottom soft fabric, measure to the quilt size and sew the right sides together leaving an opening of 4-inches to turn it out, after turning it top stitch all around the outside.
Step five - Go down with a quilting needle and thread on each corner and tie a square knot.
Birthday Banner
A birthday banner is a great idea to bring to a birthday party for a kid and gives a personalised touch to your gift, plus it's super simple to make.
All you require is some different fabrics 1/4 yard each, some ribbon, and fusible fabric interfacing.
Step one - Cut out your pendant pieces with two triangles each according to how large you want them to be, make one for each letter of happy birthday with one in between for space.
Step two - Add the fusible interfacing to the back of the fabric then cut out your letters and iron them onto the pendants. After doing this sew the pendants together by matching the right side and stitching along both of the longer sides.
Step three - Leave the top side open and turn them right side out then press, you can then take the ribbon and start to string them together, simply fold the top over and sew in a straight line to secure.
Useful Beginner Sewing Projects
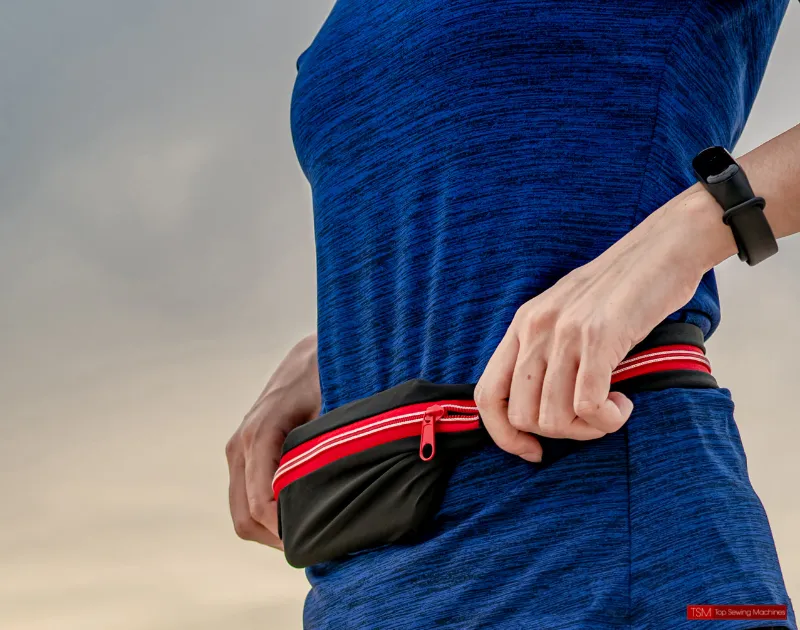
Running Belt
Running belts make a useful gift or project if you are into your fitness and are simple to sew making them the perfect weekend craft project.
For this make sure you have1/4 yard of Spandex, a 7-inch zipper, stretch needle and fold over elastic.
Step one - Measure your hips and waist then cut the spandex to this length.
Step two - Place the zipper and fabric centred together, pin the top, use a stretch needle and zipper foot on your machine, stitch as close to the zipper teeth you can then turn over and topstitch.
Step three - Take the other top side of the zipper and repeat.
Step four - Turn the belt inside out and stitch up the sides, unzip the zip the zipper halfway, turn out the sides and topstitch around the tube.
Step five - Now turn it out the right way, and cut two pieces of your fold over elastic slightly bigger than the belt then zig-zag stitch to the top and bottom.
Lip Balm Holder
Do you keep forgetting your lip balm when you leave the house, well, not now with this beginner sewing project that keeps then attached to your keys!
Simply have some scraps of quilts on hand, fusible interfacing, some ribbon, a keyring and your lip balm.
Step one - Cut two pieces of fabric and one piece of interface 2-inches wide and 7-inches long as well as a piece of ribbon that is 3-inches long.
Step two - Iron the interfacing to the wrong side of the fabric strips then fold the ribbon in half and centre it on the short side of the fused fabric.
Step three - Pin together, turn over 1/4-inch and iron the bottom edge of both fabric pieces. Place the fabrics on the right side together and pin them around the whole thing.
Step four - Stitch along the three sides of the holder with a 1/4-inch seam allowance then clip the corners and turn them right side out, stitch the bottom closed with a 1/8 seam.
Step five - Fold up the bottom 2 and 1/2-inches toward the top of the pins and edge stitch around the whole perimeter of the lip balm holder.
Beginner Projects For Accessories
Envelope Clutch
Making an envelope clutch makes a stylish accessory and not to mention an affordable one too!
For this, you will need a 12x21-1/2 inch fabric rectangle, 12x21-1/2 inch fabric rectangle (for lining) and a 12x21-1/2 inch rectangle of low-loft cotton batting.
Step one - Layer the fabrics of the envelope clutch with the exterior and lining fabric right sides together and place them atop the batting rectangle.
Step two - Fold corners at one short end until they meet in the middle like an aeroplane and press folds with an iron.
Step three - Unfold corners and cut through the pressed lines to make a paper aeroplane shape. Sew around the plane with a 1/4 seam allowance and leave a four-inch gap at the bottom, turn it right side out and use a pencil to push the corners out.
Step four - Machine stitch the bottom edge with a zig-zag stitch then form the envelope with the lining side up and point at the top, pin each side edge and backstitch at the beginning and end of each seam.
Step five - Fold the pointed edge over to finish the closure, you can add a button for finishing.
Oversized Tote Bag
Everyone loves a canvas tote bag to take to the farmers market on a Sunday or a simple grocery shop, so how about giving one to your family or friend as a fab project?
You need 3/4 yard of printed fabric for this, 1/2 yard of canvas material, 7/8 yard of patterned lining fabric, 1 yard of fusible fleece, fabric shears, a tape measure and your usual pens.
Make sure you have a denim needle and heavyweight needle on hand.
Step one - Cut the lining fabric 20-inches long and 21-inch wide and the outer fabric too, then cut the handles 24-inch long and 5-inches wide.
Step two - Sew the outside by pressing both together until fused then sew along the bottom side with a 1/2 seam allowance. Press the seam open, place the stabiliser in the centre then sew around.
Step three - Fold the top edge down 1/2-inch and sew down the sides of the bag, press open the seams.
Step four - Sew the bag lining in by folding a 1/2 seam along the top and press, stitch the sides and bottom of the bag, press open the seams like above and stitch a line 3-inches from the point.
Step five - Attach a magnetic snap to the bag to keep it closed then make the handles by folding them in half, finding the centre line and stitch both sides with a 1/8" seam.
Step six - Measure six inches from each side of the bag and stitch them in.
Final Words
To conclude, sewing a fab project as a beginner is 100% doable, whether you want to sew a perfect project as a gift or a make your blanket with some quilting skills, they can all be done with our projects above.
As a beginner make sure you don't get too overwhelmed or beat yourself up if a host of projects don't go to plan, after all, practice makes perfect and there are always sewing patterns to follow online as a handy guide.
Mum, Wife and Blogger at TopSewingMachines.uk, having excelled at textile arts in school, I soon thereafter embarked my journey as an assistant to a Fashion Designer. This fueled my passion for making clothes and soon lead me to creating Top Sewing Machines. A site where I talk sewing machines, overlockers along with tips and tricks and buyers guides.
TopSewingMachines.UK is a participant in the Amazon Services LLC Associates Program, an affiliate advertising program designed to provide a means for sites to earn advertising fees by advertising and linking to Amazon.co.uk & Amazon.com.