There are so many different projects that you can teach your kids. Those that simple, great ones to start off as ‘beginner projects’ and that’s what we’ll be looking at today!
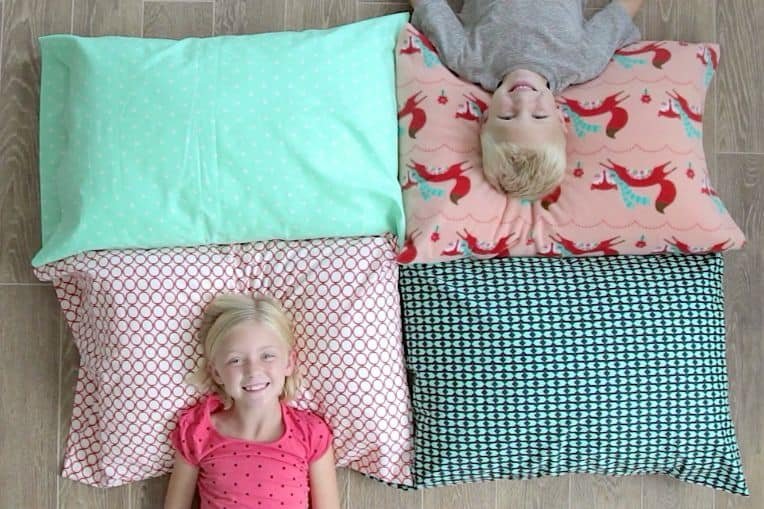
Can you imagine how exciting it would be for your child to create their very own pillowcase? Something that they designed and put together all by themselves (with only the occasional bit of input needed by you, I’m sure!). That’s what they can learn with this guide and many other projects, ideal for those who are just getting behind a sewing machine.
As I said in the introduction, pillowcases make for the perfect first project for kids so let’s start there.
As a beginner project, you can’t find a better starting point. This project will set your children up with lots of different skills that they can apply further down the line on more complex projects.

Start by picking up a plain pillowcase, any colour that you think will work.
If you have any scrap fabric around the house, this will help to use them up! Otherwise, choose some patterns or designs that you think your child will like (or let them choose - whatever works best!).
With this material, your child can create patterns or shapes to put onto the pillow. Stars, smiley faces, animals. The list is as good as your child’s imagination!
The best way to go about this is to use some paper-backed fusible webbing. If you make it the size of the pillowcase (forget about the hem) then it can work as a guide as to how much space is available.
Let the creative juices flow!
A bit of advice you may wish to pass on is to create shapes that do have a few straight lines, nothing too complicated. There is always the option to trace things that they like around the house too!
Once the masterpiece is ready, it can be cut out. It’s best to do this fairly loosely. Taking the fusible side, press them onto the backside of the fabric. Now you can cut the designs out more closely.
Now it’s time to get a few tools out! The side and long seam of the pillowcase will need to be unpicked.
Take some time to flatten out the pillowcase, you don’t really want any wrinkle on it.
Time to start putting it all together!
Take the different shapes and put them on the top of the pillowcase, arrange them how you’d like them.
I bet they’re looking great!
Once you’re happy with the position of them, you can take off the paper backing and set them in place.
Starting at the edges of the different shapes will be the best place to start sewing. This holds them in place. It’s also the easiest place to start so a fantastic point to get used to the sewing machine!
When you reach an edge and you need to change direction, simply put the needle down. The presser foot can then come up and you can move the fabric. When it’s in position, put the presser foot back down and carry on!
With curves, you might have to do this quite a lot but it does make things interesting!
Final step!! Once you have worked your way around the shape, you can cut away the thread and start on the next one.
Once all are sewn on, all that’s left to do is stitch the pillowcase back to how they were.
Bedtime is going to be an exciting time from here on in!
So what is a tidy tray and why does it make a great beginner sewing project for kids?
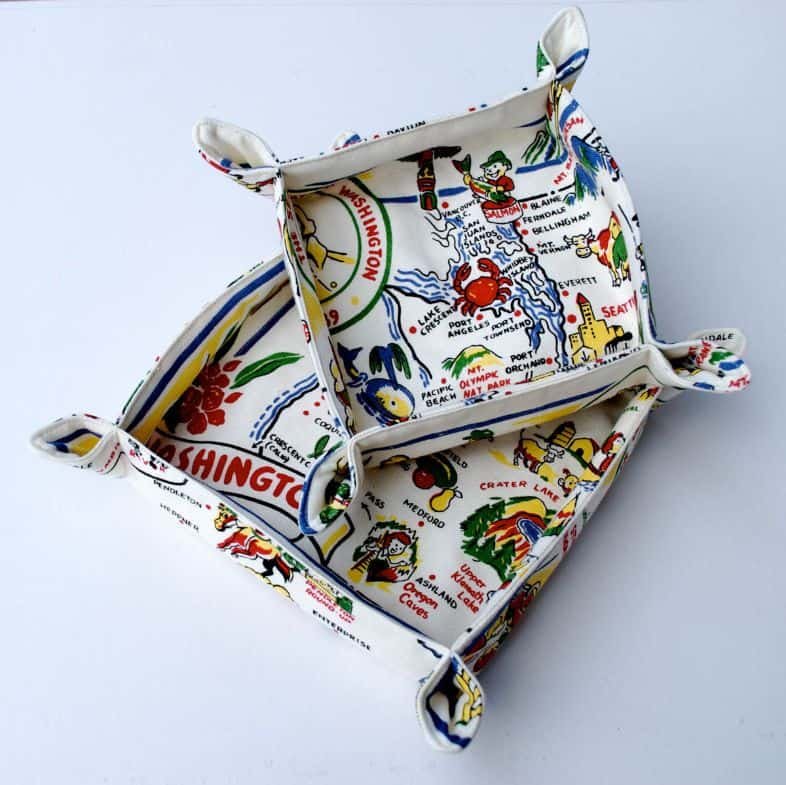
A tidy tray helps keep the little things tidy. Do you know those things that inevitably build-up, usually around the front door or on your bedside table? Yes, those! It’s a nice place to store those bits.
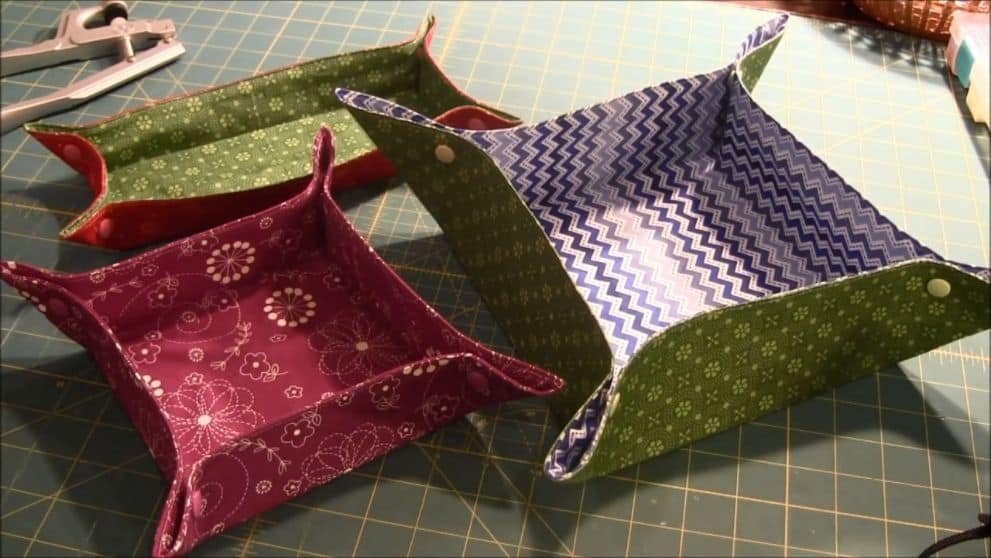
For children who are just getting to grips with sewing, this can be a really fun project to undertake and you only need to be able to sew in straight lines!
You can make your tray whatever size you want but I’ve found that 20cm x 20 cm or 28cm x 28 cm works well. Not too big but big enough they’re useful.
So you will need:
Take the batting and put it on a flat surface. Then grab the two fabric pieces and put them right sides together on top of the batting.
You will then need to pin these three layers together. It’s important to leave a space of around 6cm on one side, this is for turning.
Still being careful not to sitch over the opening, you can sew all around leaving a .5 cm gap for the seam.
Now it’s about to start taking shape! Take the four corners and turn the square on the right side out.
Take the purple marker pen and draw a line from each of the four sides, this should be around 4cm from them.
Time to sew around the square, using the lines you have created with the purple pen as a guide.
If you have a jeans topstitching foot, then take this time to fit it to your sewing machine. The next step requires you to sew through six layers at one time so your sewing machine will thank you!
Take one corner and fold it. You should be able to match two of the purple marker pen lines up nicely.
It’s a bit fiddly bit sew along that line. It’s the part that joins the edge of the fabric to the corner that is inside the square.
Did you like that step? Good!
Now do it again on the three remaining corners.
When you have, press the corners towards the tray and this will open them up so you’ll have a nice tidy tray ready to put all your bits in!
Have you got something your kids are looking forward to? Counting down the days perhaps? Make it more exciting by counting down with links...made by them!

You’re going to need:
I will talk you through making one link, then you can keep linking until your heart’s content!
So take one type of your fabric and cut 2 strips of it. Size-wise they should be around 4cm x 25cm.
Then cut a strip of the interfacing, around 2.5cm x 22cm.
Now you have three strips, yes? Perfect!
Place the interfacing strip between the two fabric strips. They should be on the right side out.
Sewing time! Go around all four sides of the fabric. Using a ⅛” allowance. If you’re catching the interface then you’re a bit too close. You don’t want to.
Once you have done that you can grab the velcro and make small squares. Around 2.5cm squared will be perfect.
On the opposite ends of your strip, sew the velcro squares on.
Nicely done! You’ve made a link!
Just repeat the process, using the various different fabrics to make as many links as you need (or want).
Let your kids hang them somewhere and presto! The countdown can begin!
Three different sewing projects to get your kids started with sewing.
Each project is designed to teach your child something new, a different sewing skill. They can then use this to go onto do more complex projects and really throw themselves into those!
Next thing you know, you’ll have a lovely quilt for your bed and your teaching efforts will have paid off!
What will you be counting down for?