One of the most common sewing machine problems, and some of the fiddliest parts about sewing have something to do with needles, whether that's threading them manually, or finding them jammed up in your machine.
Jamming your needle can either cause the needle itself to break, or jam up the fabric and ruin your project. It's highly frustrating, and can make you want to give up on your project entirely. You may even feel the need to re-thread the entire machine...which isn't a fun idea at all.
The good news is that a stuck needle can be easily fixed. And you don't need a sewing machine repair expert for it!
This guide will thoroughly inform you of how to to fix this problem as quickly and as easily as possible (for a variety of machines, including some vintage sewing machines), so stay through until the end!
The first and foremost step is to switch off all electronics.
Turn your machine off, switch the power off from the main socket too- just in case you accidentally turn the machine back on.
This will prevent any electric shocks or other injuries from occurring- and also prevent damage to your machine. This will be helpful when it comes to loosening threads and fabrics, for example, bits of thread getting caught.
Now, you'll want to raise the needle up from your fabric to suspend it higher in mid-air. This will loosen it and unbind it from any fabric and loose thread/tangled threads, whilst helping reduce any tear-related damage that may occur.
The way to do this is by simply raising the presser foot via the lifter. There will either be a lever or another means of control on your sewing machine.
You need to make sure your needle has been risen to the highest position. The best sewing machines for this task usually feature a dial/wheel for this task.
If your machine is a bit stiff, or you can't seem to move the needle position, a quick and easy fix is to move the dial back and forth a few times to loosen the gears. Even if you still can't get it to budge, don't worry. You can go straight to step number four to cure your thread jam.
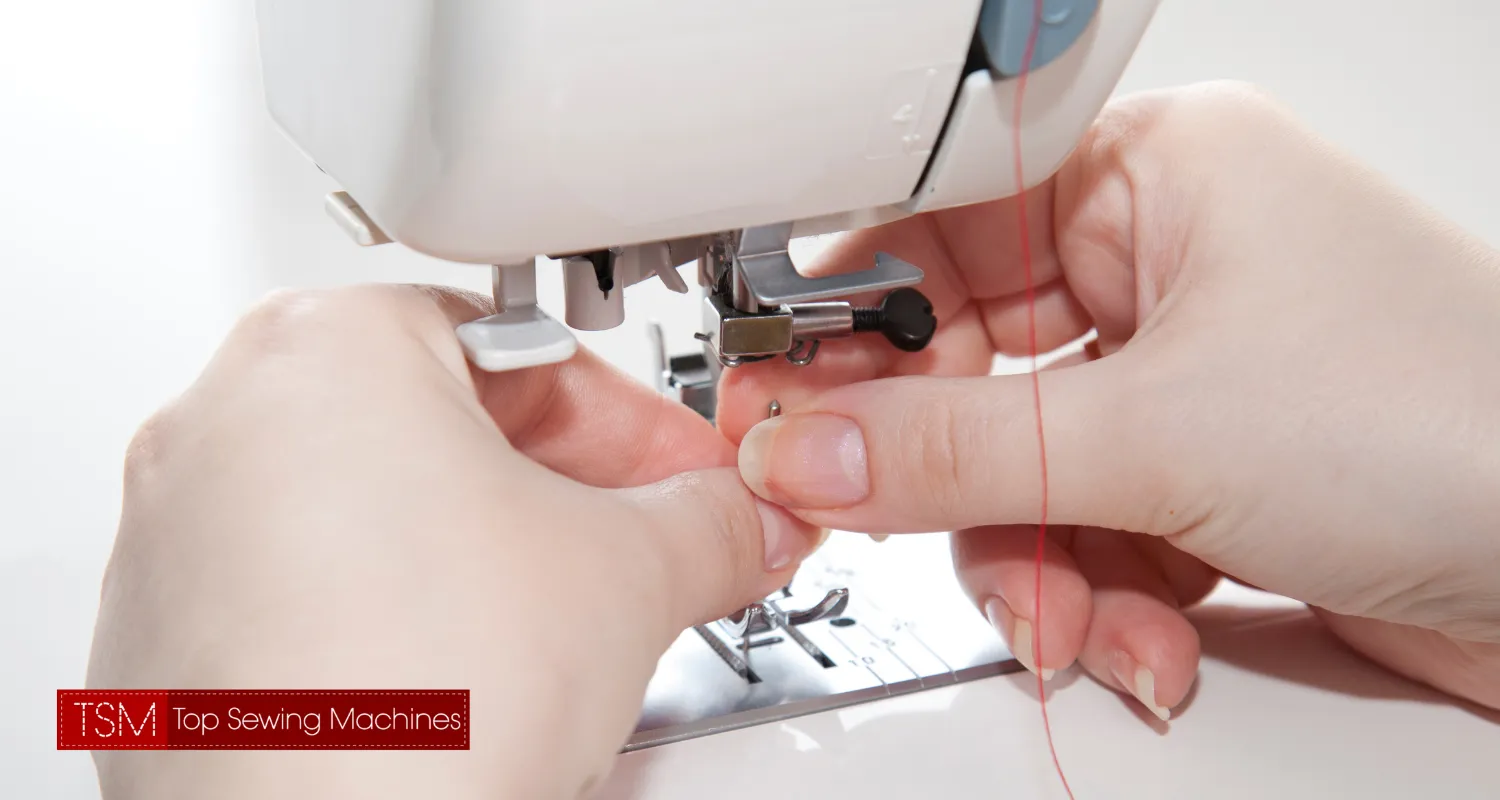
Now for the fun part. Get our your scissors...well, mini scissors.
You'll want to carefully cut the excess thread between the fabric and the needle's point. This is why it's so useful to raise the needle! A larger gap between the fabric and needle would allow you to easily cut the thread between these two points.
If you weren't able to raise your needle in step three, you will need to use this alternative way. With the needle still down, you will pull the stuck thread to make it slack enough to be cut.
Now, clean your area up a little by folding the fabric up off the toolbox. This will give you access to your machine's lower compartment.
Access this compartment and remove your bobbin case. Cut off any of the tangled bobbin thread/jammed threads.
You should find that the needle moves more freely now if you attempt step three again!
Remove any bobbin threads.
Gently tug out any fabrics- you shouldn't find difficulty with this. It should move freely.
Now, just re-assemble your bobbin and its case within your machine with all jammed threads and knots of threads loosened and removed. Now that your locked-up thread is free from the machine, you shouldn't find any stiffness when re-assembling or adjusting things.
Your previously jammed sewing machine is now ready for use again. Just thread your needle again, pull your bobbin thread back up through your needle plate, and reattach your tool-box.
After step six, we recommend adjusting your thread tension (only if necessary). This will prevent future jams.
Cheap thread can also be the culprit for thread jams, thanks to their tendency to splay and split easily. Cheaper thread, like many typical thread options available for lower prices, have stray fabrics that can loosen as a result of light friction. This is what causes jams- split thread!
We recommend a more expensive thread type. While it may seem excessive, thread quality is a game changer when helping preserve your machine's health and improving the quality of your projects. It will be tremendously beneficial in preventing a jammed sewing machine- one of the most common sewing machine problems.
For any further help- refer to your sewing machine manual. Happy Sewing!